
New Drywall Paint Prep: The Step That Saves Your Walls
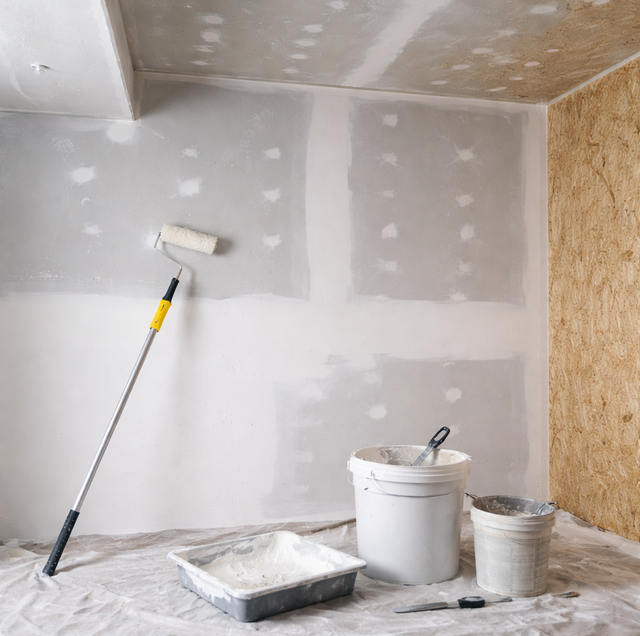
Quick Answer: New drywall needs prep because it is really two surfaces in one: bare paper facing and dried joint compound, and each soaks up paint at a different speed. Without a sealing primer to even out that thirst, your color coat dries into dull and shiny blotches. Proper prep means sanding smooth, removing all dust, checking the wall under a low side light, then priming so paint sits on one uniform surface.
You finally get the room to the point where it looks finished. The drywall is hung, the seams are taped and mudded, and the surface looks flat and ready. Then the first coat of color goes on, dries, and the wall tells a different story: glossy streaks where the tape joints run, flat dead patches over the open field, and faint outlines of every screw and seam showing through. Nothing was wrong with the paint. The wall was never sealed, and raw drywall does not take paint the way a previously painted wall does.
Why Raw Drywall Behaves Differently From A Painted Wall
A wall that has been painted before is already sealed. The old coating has closed off the surface, so new paint sits on top and dries at the same rate everywhere. New drywall has no such seal, and that is the whole reason it needs its own prep routine.
It is two surfaces pretending to be one: Look closely at a freshly finished sheet of drywall, and you are actually looking at two very different materials sitting side by side.
The large open areas are covered in the board's paper facing. Paper is mildly absorbent, but it is fairly consistent across the field of the sheet. The seams, screw dimples, and inside corners are covered in joint compound, the "mud" that the tapers spread and sand. Dried joint compound is far more porous and thirsty than paper. It pulls the liquid out of paint quickly, almost the way a dry sponge grabs water.
When you roll unsealed paint across a wall like this, the mudded areas drink the binder and pigment down into themselves, while the paper areas hold more of it near the surface. Same paint, same roller, same day, but two different results sitting inches apart.
Uneven porosity is what your eye actually sees: That difference in thirst has a name in the trade: uneven porosity. It is the root cause of nearly every problem people blame on cheap paint after a fresh drywall job.
Where the surface is more absorbent, the paint film ends up thinner and duller because more of it soaked in. Where the surface is less absorbent, more of the coating stays up top and dries with a slight sheen. The result is a wall that looks patchy in raking light even when the color is technically identical everywhere. Painters call this effect flashing, and on raw drywall it is stubborn.
What A Dedicated Drywall Primer Actually Does
The fix is not a better color paint. It is a primer built to seal, and this is the single most important reason new drywall gets "special" treatment.
It equalizes the thirst of the wall: A drywall primer, most commonly a PVA primer (polyvinyl acetate), is formulated to soak into both the paper and the joint compound and leave behind one continuous, uniformly absorbent film. Once that film is down and dry, the paper and the mud no longer behave like two separate materials. Your color coat then meets a single consistent surface and dries at the same rate across the entire wall.
That is what kills the flashing before it starts. The primer takes the beating of uneven absorption so the finish paint does not have to.
It anchors the finish and saves paint: Sealing the wall does more than fix appearance. Because the primer stops the substrate from wicking away the finish, your color coat lays down at full thickness and full color, so you usually reach a solid, even look in fewer coats. Primer is also built to grip a bare surface and give the topcoat something to bond to, which helps the whole system hold up over time.
For most homes, a standard PVA primer over a normal taped-and-sanded wall is exactly right. On walls finished to the highest smoothness level, painters sometimes reach for a high-build primer instead, which lays down thicker and helps fill the finest surface texture so the wall reads as glass-smooth under light.
Level 4 Versus Level 5: Why The Finish Level Changes The Prep
Drywall finishing is described in levels, and two of them matter most for painting.
A Level 4 finish is the common standard for living spaces. The seams and screws get their coats of compound and sanding, but the paper field between them is left bare. It looks great under normal room lighting and with a flat or matte paint, and a good coat of PVA primer seals it beautifully.
A Level 5 finish adds a thin skim coat of compound or a high-build primer over the entire surface, paper and all, so the whole wall becomes one uniform material before paint. This is the choice for walls that will catch hard side light, like a tall entry wall by a window, or for higher-sheen paints that reveal every flaw. The tradeoff is more material and labor. The prep is heavier precisely because the standard for "smooth" is higher.
Knowing which level you have tells you how far the prep needs to go. A Level 5 wall may only need priming, while a Level 4 wall being coated with a satin finish might need extra attention to keep flashing away.
The Prep Work That Happens Before The First Drop Of Paint
Sealing is the headline, but a few hands-on steps have to happen first, and skipping them shows up in the finish just as clearly as skipping primer does.
Sanding the joints smooth: The taped seams and screw spots need a final sanding so they feather out flat into the surrounding board. Ridges, roller marks in the dried mud, and sanding scratches all telegraph through paint, especially under light. This step creates fine gypsum dust, so wear a proper respirator or dust mask rather than a bandana, seal off the room, and use a sander with dust collection or a vacuum where you can. Fine drywall dust hangs in the air a long time.
Getting every trace of dust off: This is the step people rush, and it quietly ruins good paint jobs. Paint and primer will not bond to a dusty wall, and any grit left behind shows as bumps. Vacuum the walls with a brush attachment, then wipe down with a slightly damp sponge or a tack cloth and let the surface dry fully. A wall that feels clean to a bare hand is the goal before anything wet touches it.
Before priming, set a work light low and close to the wall so the beam skims across the surface almost sideways. This raking light throws long shadows off any lump, missed sanding scratch, or under-filled seam that was invisible under normal lighting, so you can mark and fix it before two coats of color go on.
Why Paint-And-Primer-In-One Struggles On Bare Drywall
A fair question at this point: modern cans that promise paint and primer in one, so why not skip the separate primer?
On an already-sealed, previously painted wall, those products can work fine, because the surface is uniform to begin with. On raw drywall, they run straight into the problem this whole article is about. A self-priming paint still has to fight the uneven porosity of paper versus joint compound, and it generally is not formulated to seal that thirsty mud as thoroughly as a dedicated primer does. The usual outcome is flashing at the seams and extra coats chasing an even look. A separate sealing primer solves the problem once, and the color coats go on predictably after that.
How Many Coats You Should Plan On
For a typical new-drywall wall, the reliable recipe is one coat of drywall primer followed by two coats of finish paint. The primer seals and unifies, and the two finish coats build even color and hide.
You can sometimes get away with a single finish coat over primer with a very forgiving flat color, but two is the safe default, especially for deep or saturated colors and for any sheen above flat. Let each coat dry for the time the product calls for before recoating. Rushing a recoat traps solvent and can leave the surface soft or streaky. Keep the room ventilated while you prime and paint so the coatings cure properly and the air stays breathable.
Frequently Asked Questions
Not effectively. Standard wall paint is engineered to build color and sheen, not to penetrate and seal, so it sits on top of thirsty joint compound instead of soaking in and equalizing it. You will still get flashing, and you will burn through expensive finish paint doing a primer's job. Even thinned down, it lacks the sealing binders that a true PVA primer carries.
Yes, in specific spots. Ceilings and walls in a bathroom or laundry area often call for a moisture-resistant or stain-blocking primer rather than plain PVA, and any spot with a marker line, a water stain from a construction leak, or a sap-prone knot showing through nearby trim wants a shellac-based or oil-based stain-blocking primer so the discoloration does not bleed up through the finish coats.
The joint compound has to be fully cured, not just dry to the touch, which usually means giving the final mud coat at least 24 hours in good conditions, longer in a cool or humid space. Priming over compound that is still damp underneath can trap moisture and cause the primer to crack or lift. Press a fingernail lightly at a thick seam: if it dents or feels cool and clammy, it needs more time.
Yes, and most paint counters will do it for free. Having the primer tinted toward a gray or a shade of your final color means the deep topcoat has far less white to cover, which can save you a full finish coat. A bright white primer under a bold navy or deep red often needs three color coats to look solid, while a gray-tinted primer can get you there in two.
They do. The metal or vinyl corner bead under the compound can flash or even show faint rust bleed through ordinary primer if it was scuffed during the hang, so those edges benefit from a spot of stain-blocking primer. Outside corners also take the most physical abuse, so many painters run an extra pass of primer there for a slightly tougher film before the finish goes on.
Primer reveals flaws; it does not hide them. A thin sealing coat has no build to fill gouges, ridges, or visible tape edges, and once it dries flat, it often makes those defects more obvious, not less. That is actually useful: a coat of primer is a common trick to expose every remaining imperfection so you can sand and spot-fill before the finish coats, rather than discovering them in the final color.
Book a free estimate before your color coat goes on — get a wall that is sealed, smooth, and blotch-free the first time. True Coat Painting serves Reno, Sparks, and Spanish Springs. Call (775) 227-0618.
