
Why Prep Makes Paint Last: The Bond Does the Work
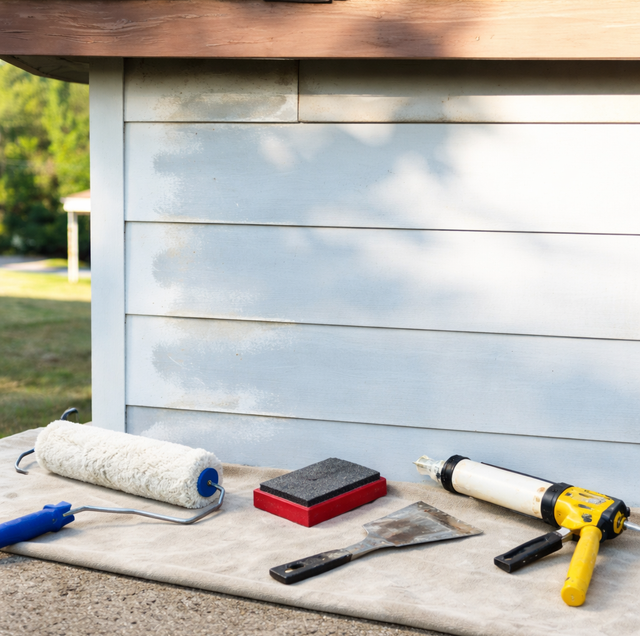
Quick Answer: Paint fails at the bond between the coating and the surface, not in the paint film itself. Cleaning, dulling glossy areas, scraping and feathering loose paint, filling and caulking, and spot-priming bare or stained spots all build that bond. Skip the prep and even premium paint peels early.
You watched the crew roll on two even coats. The color looked deep and uniform, the finish dried without a flaw, and eighteen months later it is flaking off in sheets near the windows. Almost everyone blames the paint. The paint is rarely the problem. What failed was the connection between the coating and the wall underneath, and that connection is built long before the first gallon is opened.
Paint Fails At The Bond, Not The Film
A cured coat of paint is a thin, flexible plastic skin. On its own, that skin is durable; it resists water, and it holds pigment for years. It stays on a surface for exactly one reason: adhesion, the grip between the bottom of the paint film and whatever it was applied over. When paint peels, cracks in sheets, or lifts at the edges, the film itself did not wear out. The grip let go.
Adhesion is partly mechanical and partly chemical. Mechanical grip comes from the coating flowing into the tiny pores and scratches in a surface and locking in as it dries, like roots working into soil. Chemical grip comes from the paint binder actually keying to a clean, compatible layer beneath it. Both need one thing to happen: the paint has to touch a sound, clean, slightly toothy surface. Anything sitting between the paint and that surface- dust, a greasy film, a chalky powder, or a glassy sheen- becomes the weak layer the whole coat hangs from. The paint is not gripping the wall anymore. It is gripping the grime.
That is the single idea that explains every prep step below. Each one removes a weak layer or creates the tooth and seal a lasting bond needs.
What Actually Breaks The Bond
A handful of common conditions keep paint from grabbing hold. Knowing them makes every prep step make sense.
Dirt, chalk, and grease: Exterior walls collect dust, pollen, and a fine chalky powder that older coatings shed as their binder breaks down over years of sun exposure. Interior walls near a stove or in a bathroom pick up an invisible film of cooking oils and body oils. Paint rolled over any of these bonds to the contaminant, not the substrate, and the contaminant lets go under the first real stress.
A glossy or slick surface: Semi-gloss and gloss coatings, along with many varnishes and old oil-based finishes, cure to a hard, tight surface with almost no tooth. Fresh paint slides across it with nothing to key into. This is why a new coat over glossy trim can often be peeled off in a strip weeks later.
Loose or failing old paint: If the previous coat is already cracking, curling, or blistering, its own grip is gone. Any new paint laid over it inherits that failure and comes off with it. A sound bond cannot be built on top of a loose one.
Moisture in or behind the surface: Water is the enemy of adhesion. Damp wood, a wall that wicks moisture from behind, or a surface painted before it fully dried traps vapor under the film. As that moisture tries to escape, it pushes the coating off from underneath, which shows up as blisters and peeling.
Bare wood, raw drywall, and patches: Uncoated surfaces are porous and thirsty. Bare wood and new drywall drink the liquid out of a topcoat unevenly, starving the film and leaving a weak, blotchy bond. Joint-compound patches and wood filler behave the same way. These spots need to be sealed before they will hold a finish coat.
Cleaning And Degreasing Come First
Because contamination is the most common bond-breaker, washing is step one on nearly every job. Exteriors get a wash to strip off dust, pollen, and chalk, often a hand scrub or a controlled pressure rinse with a mild cleaner, followed by a clear-water rinse so no residue is left behind. A quick way to check for chalk is to rub a dark cloth across a dry wall; if it comes away dusty, the surface still needs washing.
Interior kitchen and bath walls, and any trim that gets handled, get degreased. A common choice is a diluted trisodium phosphate substitute or a dedicated degreaser, wiped on and rinsed. Glossy grease you cannot see is exactly the kind of weak layer that fails months later, so this step matters most in the rooms where it is easiest to skip.
To check a dry exterior wall for chalk, rub a dark cloth across it. If the cloth comes away dusty, the surface still needs washing before any paint goes on, or the new film will bond to the powder instead of the sound wall.
Dulling The Gloss With A Scuff Sand
Any surface with a sheen gets scuff-sanded, a light pass with fine sandpaper, usually somewhere around 150 to 220 grit, or a sanding sponge for trim and moldings. The goal is not to strip anything. It is to knock the shine down to a uniform dull haze so the surface has microscopic tooth for the next coat to grip. You are trading a slick, glassy face for a slightly rough one. On previously painted trim and cabinets, this scuff step is often the difference between a finish that lasts years and one that chips at every knock.
Sanding creates fine dust, so wear a respirator or at least a snug dust mask, and wipe or vacuum the surface clean afterward, because the dust you just made is itself a bond-breaker if you paint over it.
Scraping And Feathering Loose Edges
Where old paint is failing, it has to come off down to a firmly attached edge. A scraper or putty knife lifts everything loose, then those hard edges get feathered, sanded so the border between bare surface and remaining paint tapers to a smooth ramp instead of a cliff. Feathering matters because an abrupt paint edge telegraphs right through fresh coats as a visible ridge and becomes the spot where peeling starts again. A feathered edge disappears under primer and paint and gives the new coat a continuous surface to hold.
Paint in homes built before 1978 may contain lead. Do not dry-sand or dry-scrape it, which throws lead dust into the air. Test suspect paint first, and if lead is present, follow lead-safe work practices or bring in a licensed abatement pro.
Filling, Caulking, And Sealing Gaps
With loose paint gone, surface defects get addressed. Nail holes, dents, and gouges are filled with wood filler on trim and doors, and patching compound on drywall, then sanded flush once cured. Cracks and open joints where two materials meet, trim against a wall, siding against a window frame, get a bead of quality caulk. Caulking is not only cosmetic. It closes the gaps where water would otherwise get behind the coating and drive the peeling described earlier. A flexible, paintable caulk moves with the joint as the house expands and contracts through daily temperature swings, so the seal holds instead of splitting open the first hot afternoon or cold night.
Spot-Priming Bare, Patched, And Stained Areas
Every spot that is now bare, raw wood, exposed drywall paper, feathered scrape zones, and fresh filler gets primed before the finish coats go on. Primer does two jobs a finish paint cannot do as well. It bonds aggressively to difficult surfaces and dries to a uniform, slightly toothy layer the topcoat can grab, and it seals porous material so the finish coat lays down evenly instead of sinking in and going flat in patches.
Primer also blocks stains and bleed-through. Water stains, tannins that leach out of woods like cedar and redwood, smoke, and marker will ghost up through ordinary paint no matter how many coats you add. A stain-blocking primer, shellac-based or a quality water-based stain blocker, locks those contaminants down so they cannot migrate into the finish. Priming the whole surface is not always required, but priming the bare and stained spots almost always is, which is why a well-prepped repaint looks and holds like new rather than paint smeared over old problems.
Let It Dry, Then Mask
Surfaces have to be dry before coating. Washed exteriors need time to release their moisture, filler and caulk need to cure, and primer needs to set up according to its own recoat window. Painting over any of these too soon traps moisture or solvent and undermines the bond you just built. Patience here is part of the prep.
Masking is the last prep move: tape and paper or plastic to protect trim, glass, floors, hardware, and fixtures, and drop cloths over everything below. Clean masking lines are what separate a sharp job from a sloppy one, and pulling protected surfaces out of the line of fire also means less scraping and touch-up later.
Why Prep Is Most Of The Work
On a quality repaint, the rolling and brushing is the fast part. The cleaning, sanding, scraping, feathering, filling, caulking, priming, drying, and masking are where most of the hours go, and it is the part you cannot see once the color is up. That invisible labor is exactly what you are paying a real painter for. Two crews can lay down the same paint and the same color, and the one that prepped properly will still look sound years after the other has started to peel.
Paint does not last because of what is in the can. It lasts because of what is under it. A coating is only ever as durable as the surface it grips, and that surface is built by hand, one prep step at a time, long before anyone opens the paint.
Frequently Asked Questions
Give exterior surfaces enough time to release the water they absorbed, which is often a full day or more, and longer for dense wood, cool weather, or shaded walls that dry slowly. A simple field check is to tape a square of plastic sheet tightly over the surface and leave it a few hours; if moisture beads under the plastic, the wall is not ready. A moisture meter reading in the safe range for the material is the reliable confirmation.
A dedicated bonding primer is formulated to grip slick surfaces and can stand in for scuff-sanding on many gloss finishes, which helps on intricate moldings that are hard to sand evenly. It still relies on a clean, degreased surface to work, so the wash step is not optional. On heavily worn or oil-based glossy trim, a light scuff plus the bonding primer together give the most reliable hold.
Primer is engineered for adhesion and sealing rather than for color and wear resistance, so it does jobs a topcoat cannot: it keys to hard-to-stick surfaces, evens out porosity so the finish does not flash dull in spots, and it can block stains and tannin bleed. Extra finish coats add film thickness and color depth but do not add the specialized bonding and stain-blocking chemistry, which is why two topcoats over a bare or stained area still fail where one primer coat would have held.
Caulk seals the open joints where two materials meet, and those joints are the main entry points for water to get behind the coating and push it off from the back. A paintable acrylic-latex or a siliconized acrylic caulk stays flexible. It moves with the joint through daily expansion and contraction, so the seal survives the temperature cycling that would crack a rigid filler. Skipping caulk is a common reason paint fails around windows and trim seams even when the flat surfaces still look fine.
Press a strip of painter's tape firmly onto the existing paint and pull it off fast: if flakes lift with the tape, the old coat is failing and needs scraping back to a tight edge. You can also press a coin edge along the surface; sound paint resists it while failing paint chips and powders away. Any area that crackles, blisters, or shows a spiderweb of fine cracks should be scraped and feathered rather than painted over.
Any home built before 1978 can have lead-based paint under later coats, most often on trim, doors, and window sashes where durable oil paints were used. Buy an inexpensive lead test swab and check suspect layers before you disturb them, and never dry-sand or dry-scrape lead paint, which releases fine dust that is the main exposure risk. If a test is positive, use lead-safe methods such as wet scraping and containment, or hire a certified lead-abatement contractor rather than handling it yourself.
Book a free estimate and let a prep-first crew make your paint last — a finish built on real surface prep holds for years, not months. True Coat Painting serves Reno, Sparks, and Carson City. Call (775) 227-0618.
